 To do this, you're going to need:
~ 2 DPNs (I recommend in a slightly smaller size than what you're doing the knitting in. Here I'm using a 2mm sock needle, just because it's what I had handy. The sweater itself is knit on size 8 US needles, so you needn't go quite that small)
~A cable needle (or you can use the same DPN, since my cable needles went on a vacation while I was shooting this)
~A crochet hook, preferably 1-2 sizes smaller than the needles the original garment is worked on, but one of the same size will do
~Some guts and possibly a stiff drink, depending on your constitution
~It is also extremely helpful, but not strictly necessary, to know how to knit back backwards. This is the video I used to learn, but there are a lot more out there now.
This technique works best with a straight-up cable; you'll have to do a lot more work with a traveling cable or anything fancier. Read your pattern carefully to make sure you understand what you need to do.
My pattern called for a cable twist every 4 rows. This means I have a purl row, a knit row, another purl row, and then a cable twist.

I went to the bottom of the pattern work (just above the ribbing) and counted up four rows. On the forth row, I inserted the DPN through the right leg of each stitch, acting like a lifeline.
Now, on a right side row, follow your pattern until you reach the problem area, take a deep breath and drop all of those stitches (4, in my case). Leave rest of the stitches on your needles (if you have point protectors, you might find it handy to cap them to keep stitches from sliding off).
Let the stitches ladder until they hit the DPN. Assist them and do a shot if needed.
(Really, it's not that scary when you get used to it).
 *Now, slip two stitches from the DPN onto your cable needle and hold it to the front.
 Grab your crochet hook and slide it through the first stitch on the dpn knitwise. Grab the lowest run of the ladder created by the dropped stitches, and pull it through. Slide that stitch off the DPN, and repeat with the second stitch, then move on to the cable needle.

When all four stitches have been knit, make sure that they are facing the right way (not twisted or anything) and slip them back on to the DPN. Now knit with the ladder rungs for another 3 rows, without the cable twists, and repeat from the *.
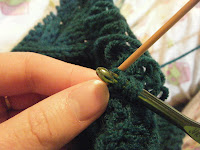
 I found it easier after a while to skip the DPNs and the crochet hook and just use my normal needles, knitting back backwards on purl rows and knitting normally with the ladder rungs on knit rows, but this might not be the case for you (remember, I said this was fiddly). (In the picture, you can see the ladder rung is over my index finger, while the actual working yarn is just hanging out in the upper right. The hardest part is just making sure you're knitting with the right rung).
Here is how the sweater front looked when I was finished:

And this is what it looks like today:

I am unbelievably proud of that pocket. I've been stashing my ball of yarn and my cable needle inside so I don't loose it again. Technically, sewing up the pocket was supposed to wait until the end, but I got too excited. For some reason, pockets and sweaters never connected in my head in the past, and I find the idea of knitting one in most exciting.
I freely admit I'm not very good with this whole teaching thing, so if you have any questions about how I did this, jut leave a comment and I'll do my best to clarify.
No comments:
Post a Comment